How To Apply your Wall Art
ZamaDesigns have three layers—the transfer paper (clear), the design, and the paper backing. Two people are recommended for installation, and you will need:
- A dry cloth to clean the wall surface
- Debit card, driver’s license or any other plastic card
- Masking tape
- A level tool
Step 1 Make sure your surface is CLEAN. Wipe the surface of your wall with a lint-free cloth to make sure that it is dust free, oil free, smooth, clean and dry. – Step 2 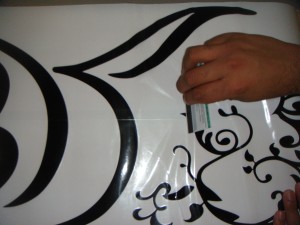 Place your ZamaDesign on a flat hard surface. Take the debit card or any other plastic card and smooth out any air bubbles (working from the center out) that may have formed during shipping.
–
Step 3
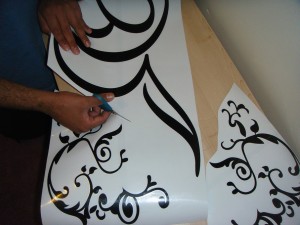 If your ZamaDesign has multiple art on the same sheet or if it is a large sized ZamaDesign that has separate parts of the art fitted into one sheet, cut them into separate pieces.
–
Step 4 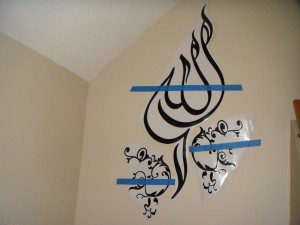 Arrange your ZamaDesign on the wall using a masking tape. Make sure it is centered and in level. You may use a level to do this. Use masking tape to create a “hinge” in the middle of the art.
–
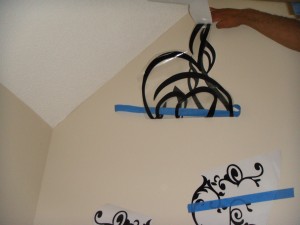
Step 5 Starting from above the hinge, peel the backing pulling closely to the surface. If Art sticks to the paper backing while peeling, just simply roll back, press the art onto the transfer paper, and peel it off again. Once you have reached the hinge part you may cut off the backing. 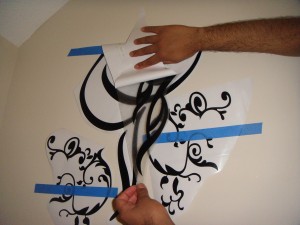
–
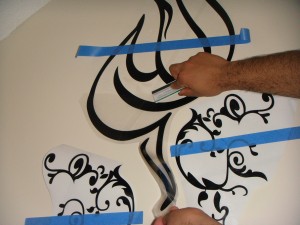
Step 6 Once the backing is removed, place the transparent transfer paper with art on the wall starting from the middle hinge and working your way out. Use a debit or any plastic card to gently smooth out your ZamaDesign onto the wall. Repeat the same for below the hinge and the rest of the art. 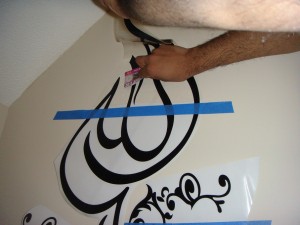
–
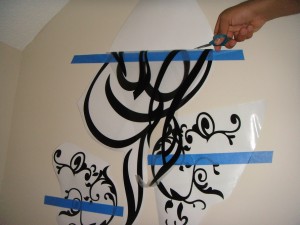
Step 7 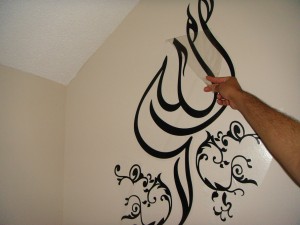 After applying your ZamaDesign on the wall, the last step is to remove the transfer paper. Starting at one corner, slowly remove the transfer paper, pulling closely to the surface. If any part of the art sticks to the transfer paper or comes off, simply roll back a bit, press the art on the wall then continue peeling. Cut the access transfer paper if it becomes unmanageable. After peeling away the transfer paper smooth the art onto the wall using your fingers. If there’s any bubbles trapped inside simply take a needle and poke the bubbled area a couple of times, then smooth it out with your hands.
–
Alhamdulillah, enjoy your you wall art!